Citizen portal setup
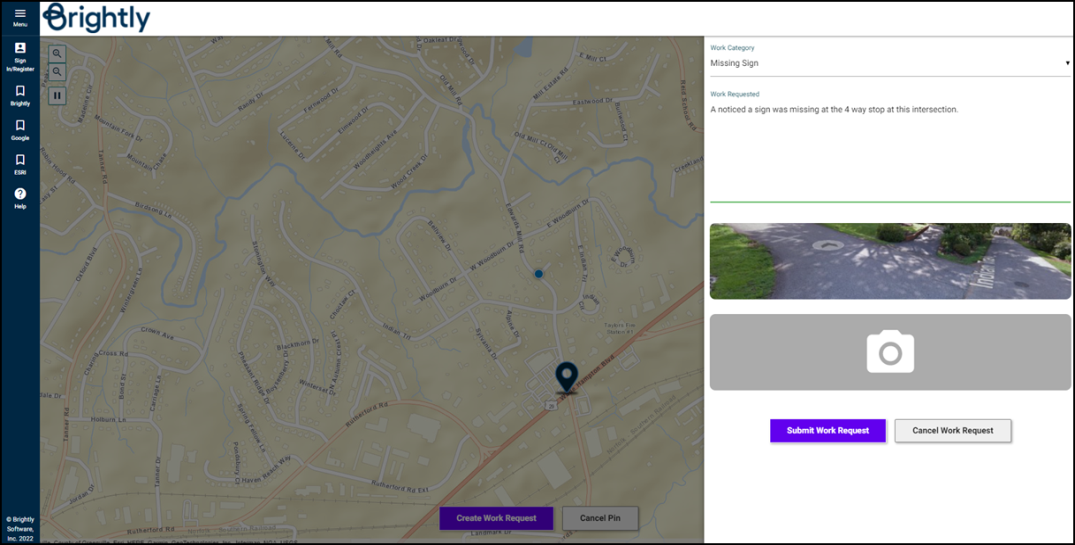
The Asset Essentials Citizen Portal allows citizens to create work requests with or without an Asset Essentials account. *Note: Currently, the Asset Essentials Citizen Portal is only available to clients whose Asset Essentials accounts were created July 17th, 2019 or later. If your account was created on or after that date and you would like to utilize this feature, please call Client Services. Existing clients will have the option to add the Citizen Portal to their account in the future.
Setting up the citizen portal
- Click on the Admin menu icon, then select Configurations.
- In the Misc section, click on Citizen Portal.
- Click the Edit button. *Note: If you are making changes to this page for the first time, you will not need to click the Edit button before you begin making your changes.
- Keep the Enable Anonymous Requests box checked if you would like to allow users to submit work requests without signing up for a Citizen Portal account. *Note: Anonymous users that submit requests will be asked if they would like to sign up for an account after submitting a request.
Bright Idea:We recommend that you do not utilize the Anonymous Requests feature. Anonymous requests do not give you the ability to identify who submitted the request if more clarification about the request is needed.
- Select the WO Status every request entered on the Citizen Portal will have when it is created in Asset Essentials. We recommend use a WO Status, such as "Citizen Request". *Note: The WO Status must apply to all Sites and belong to the Request Status Category.
- Enter a Disclaimer in the text box. Citizens must accept the Disclaimer in order to view the map and submit requests.
- In the Logos section, you have the option to upload a logo to display on the Login Screen as well as the Header above the map. Click the image icon (
 ) in either section to choose a file on your computer. *Note: Be sure to follow the image requirements listed in this section.
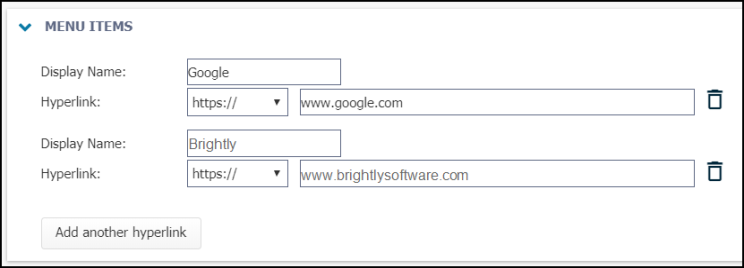
 - The Menu Items section allows you to create custom links in the main navigation menu.
- Enter the Display Name for the menu item.
- For the Hyperlink fields, select the appropriate protocol from the drop down menu, then enter the link address. *Note: You do have the option of selecting a "mailto" link if you would like users to be able to directly email a person or group at your organization.
- Click the Add another hyperlink button to create additional menu items. You can add up to five menu items.
- Click the trash can icon (
 ) to remove a menu item.
|

|
- Select the Work Categories that should appear as options in the Citizen Portal. If a Work Category is associated with multiple Sites, the user will be asked to select the appropriate Site when filling out the request.
- Click the Save button. Your Citizen Portal link will now be visible at the top of this page.


